How to create a product template with separate/different customizable areas.
In Qstomizer you can create a product template with separate customizable areas.
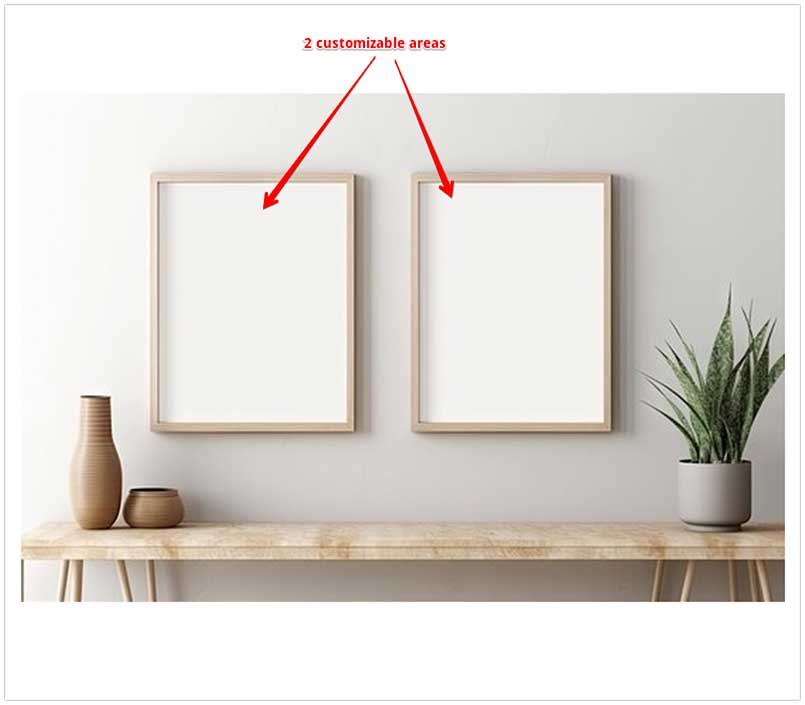
For instance, to ilustrate how to create it, let's create a template with 2 areas (you could create a template with more areas if you need it). In this tutorial we will use Photoshop to create the images but you can use any other image software like GIMP or any other.
To create a template with more than 1 customizable area, you will need 2 images of the product:
- - A image of the product in JPG/JPEG or PNG.
- - A mask of the product in PNG where the customizable areas are transparent.
Image of the product in JPG/JPEG or PNG
We can use an image with any size but in this case, we are going to create the image of the product with the size of the Qstomizer's canvas.
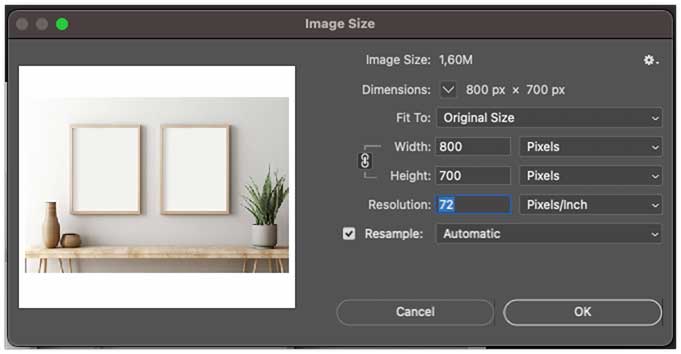
Save the file in JPG and name it "base.jpg".
Mask of the product in PNG
We are going to use the same image and with the same size (800x700px). It is important to note that the image must have exactly the same size, because the customizable areas must match in both files, the base image and the mask.
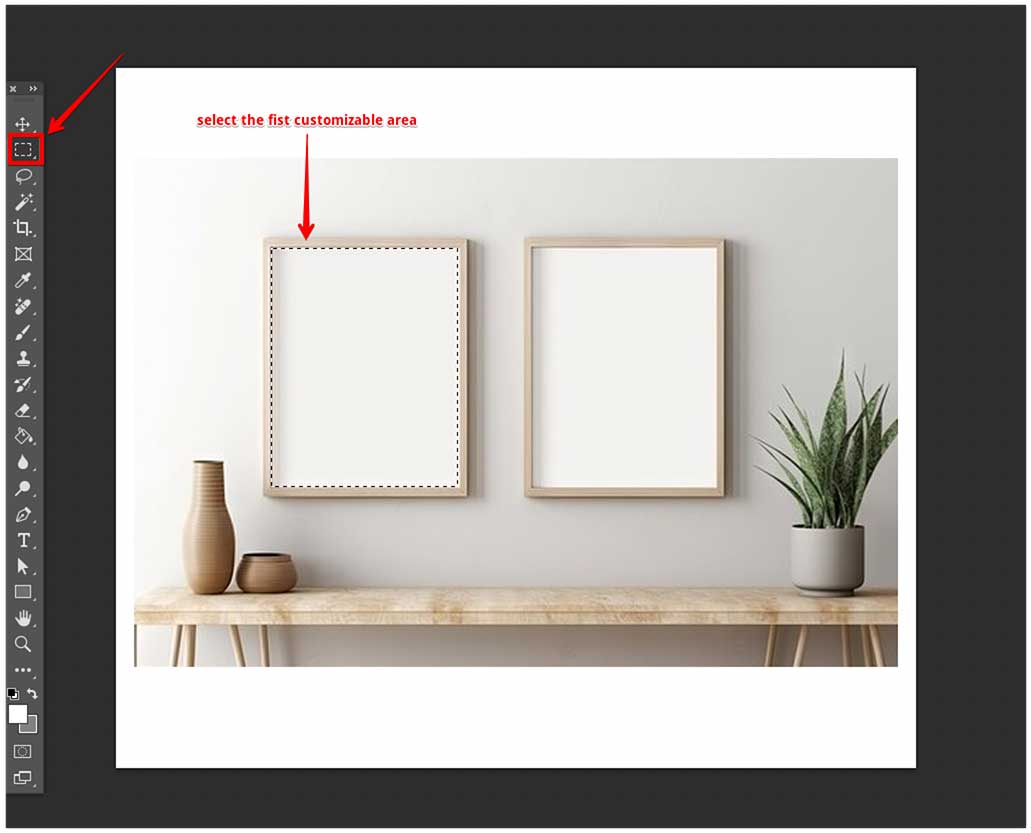
Select the markee tool (or the lasso tool if the area is irregular) to select the first customizable area (the first frame).
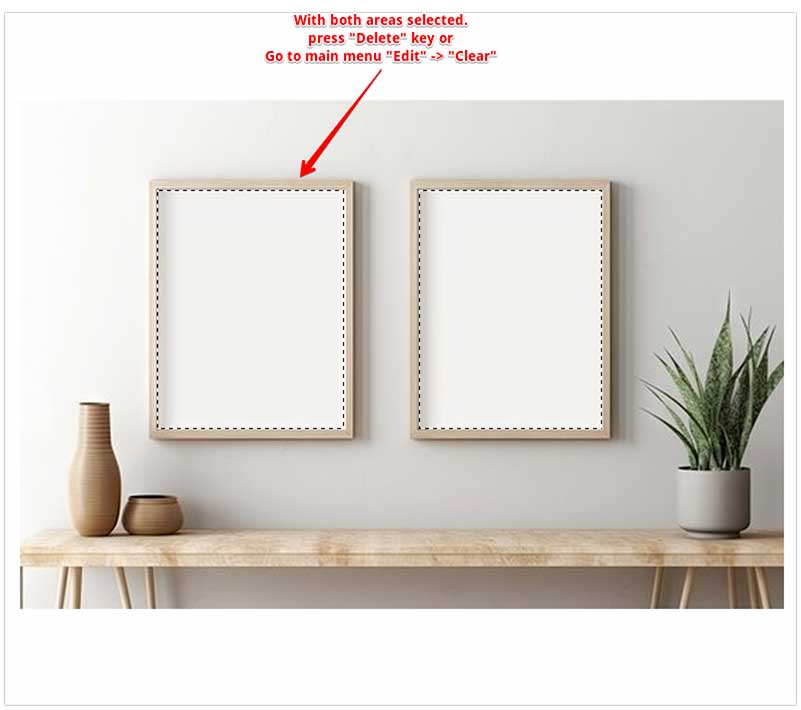
Press the shift key and while pressing it, select the second customizable area (second frame). Then press the "Delete" key or in the main menu, select "Edit"->"Clear" option.
In the in the "Layers" window, hide the background layer.
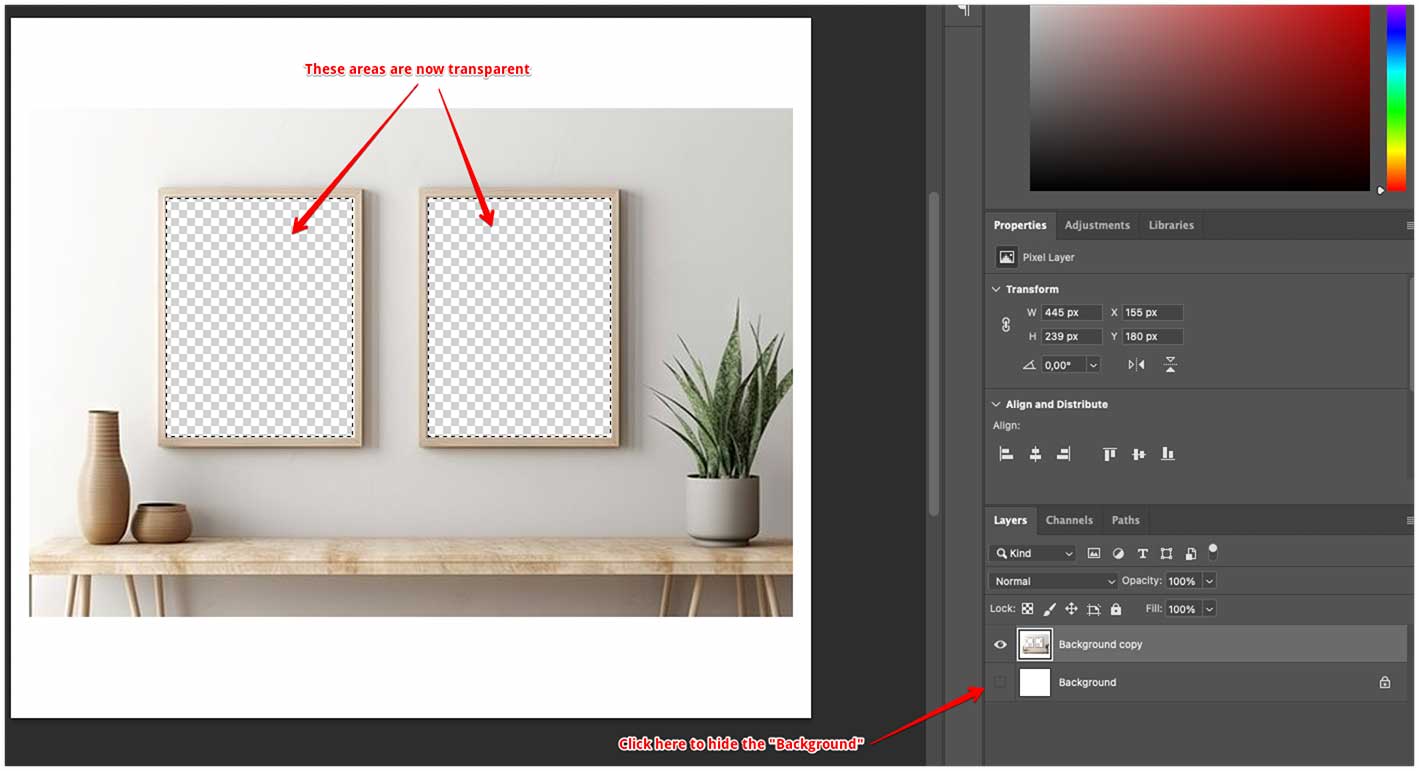
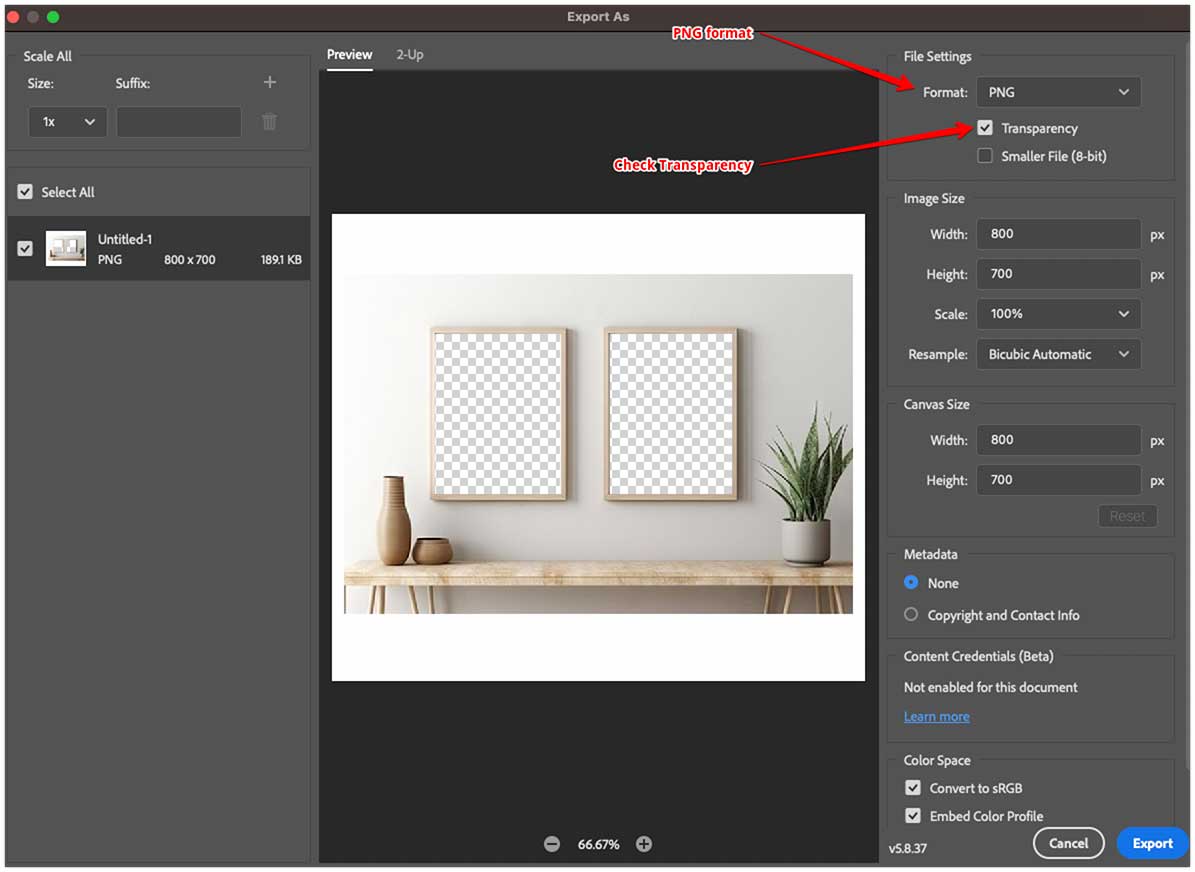
Save the file without the background layer in PNG. Notice that the PNG file must have active the transparency.
To save the file, select File->Export->Export as... and save the file in PNG. Remember to check the Transparency check.
Now we have the files we need to create the template. A base image of the product in JPG and the mask of the product in PNG format.
Create the product template in Qstomizer.
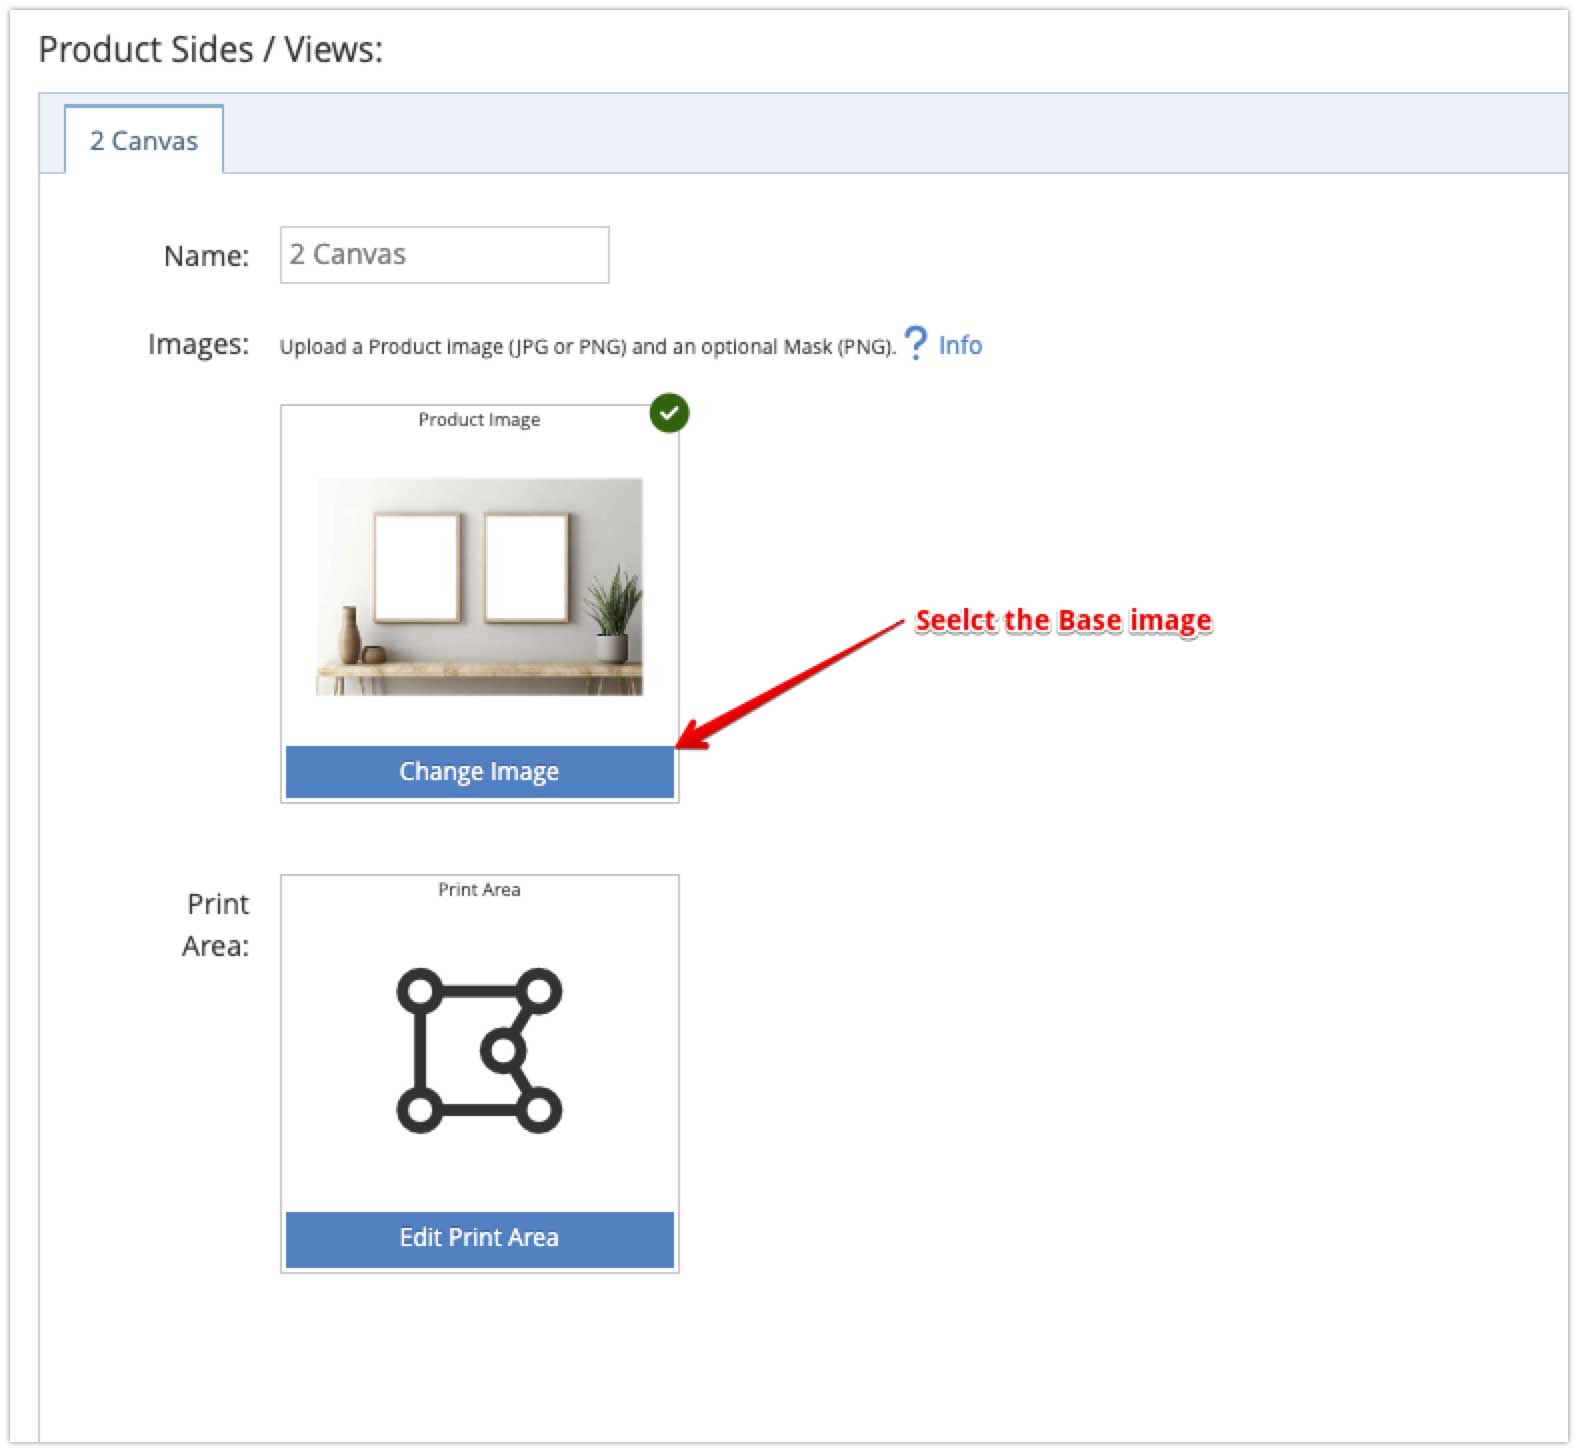
Create a product as usual (Tutorial here) and when you have to select a pre-made template or create your own, click on the "Create a new product tempalte" button.
Fill the name of the product and select the Family and main color of the product. In the image of the product, select the base.jpg image that we created in the previous steps.
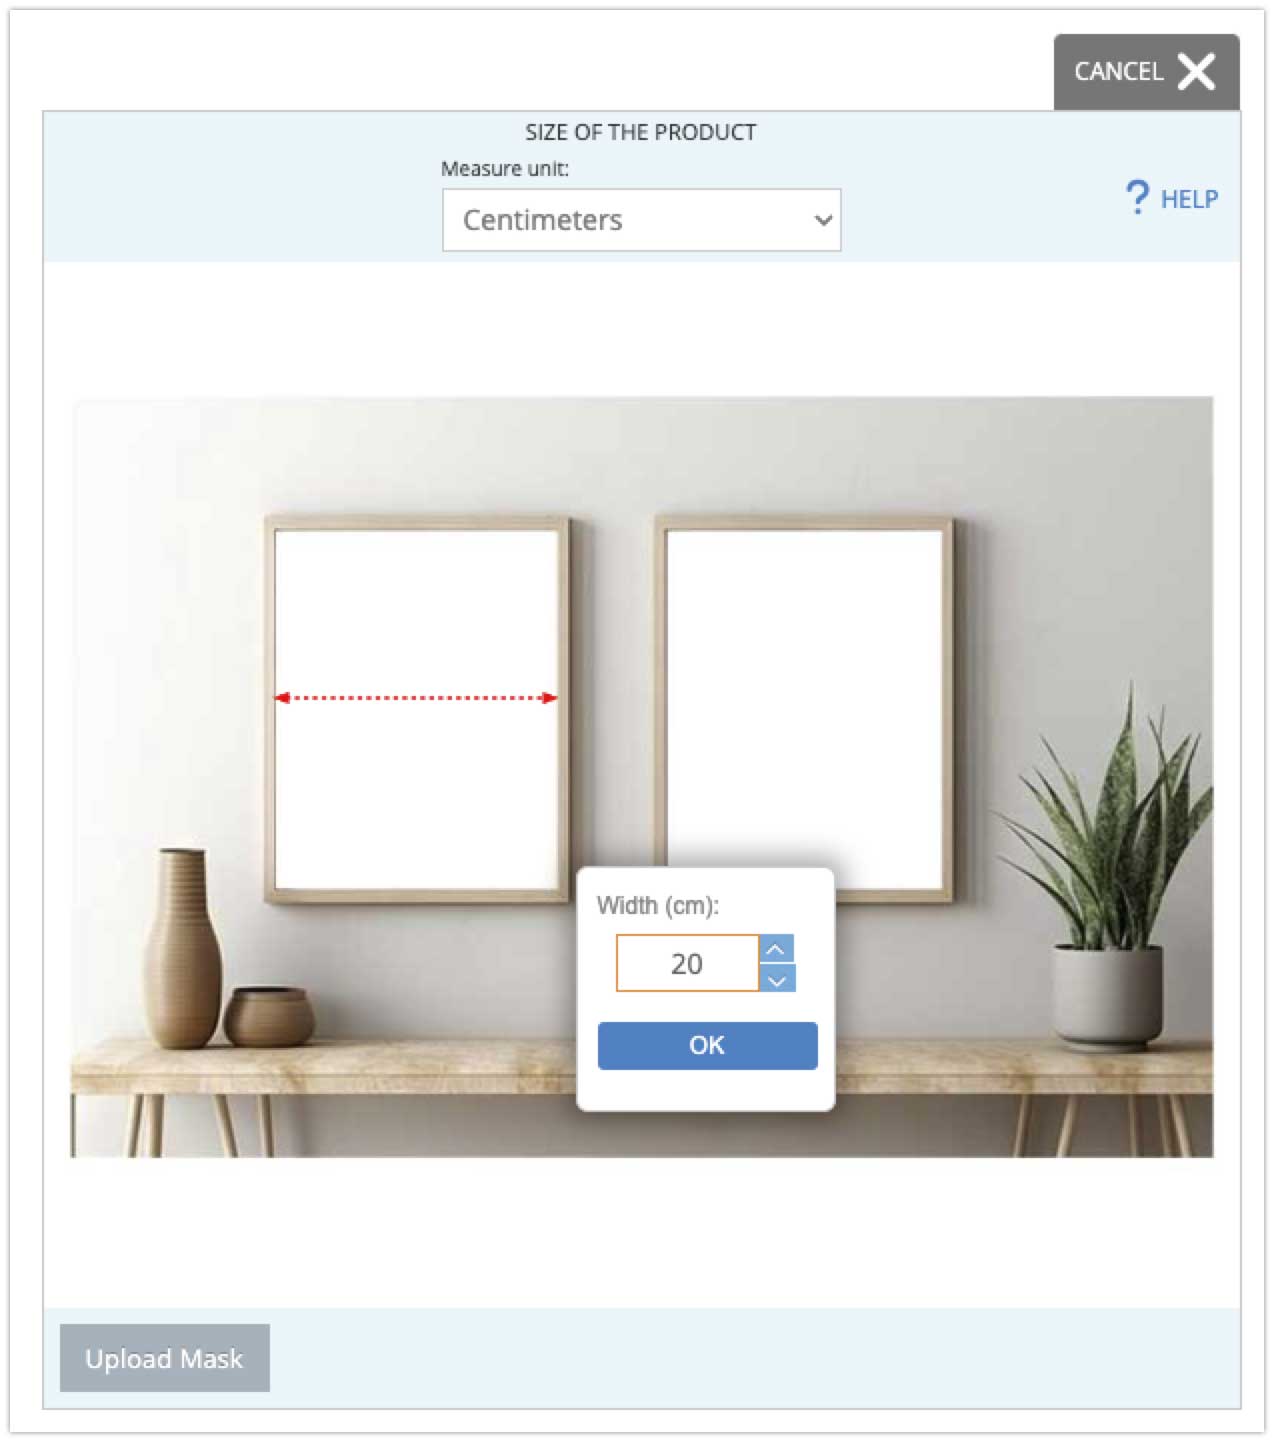
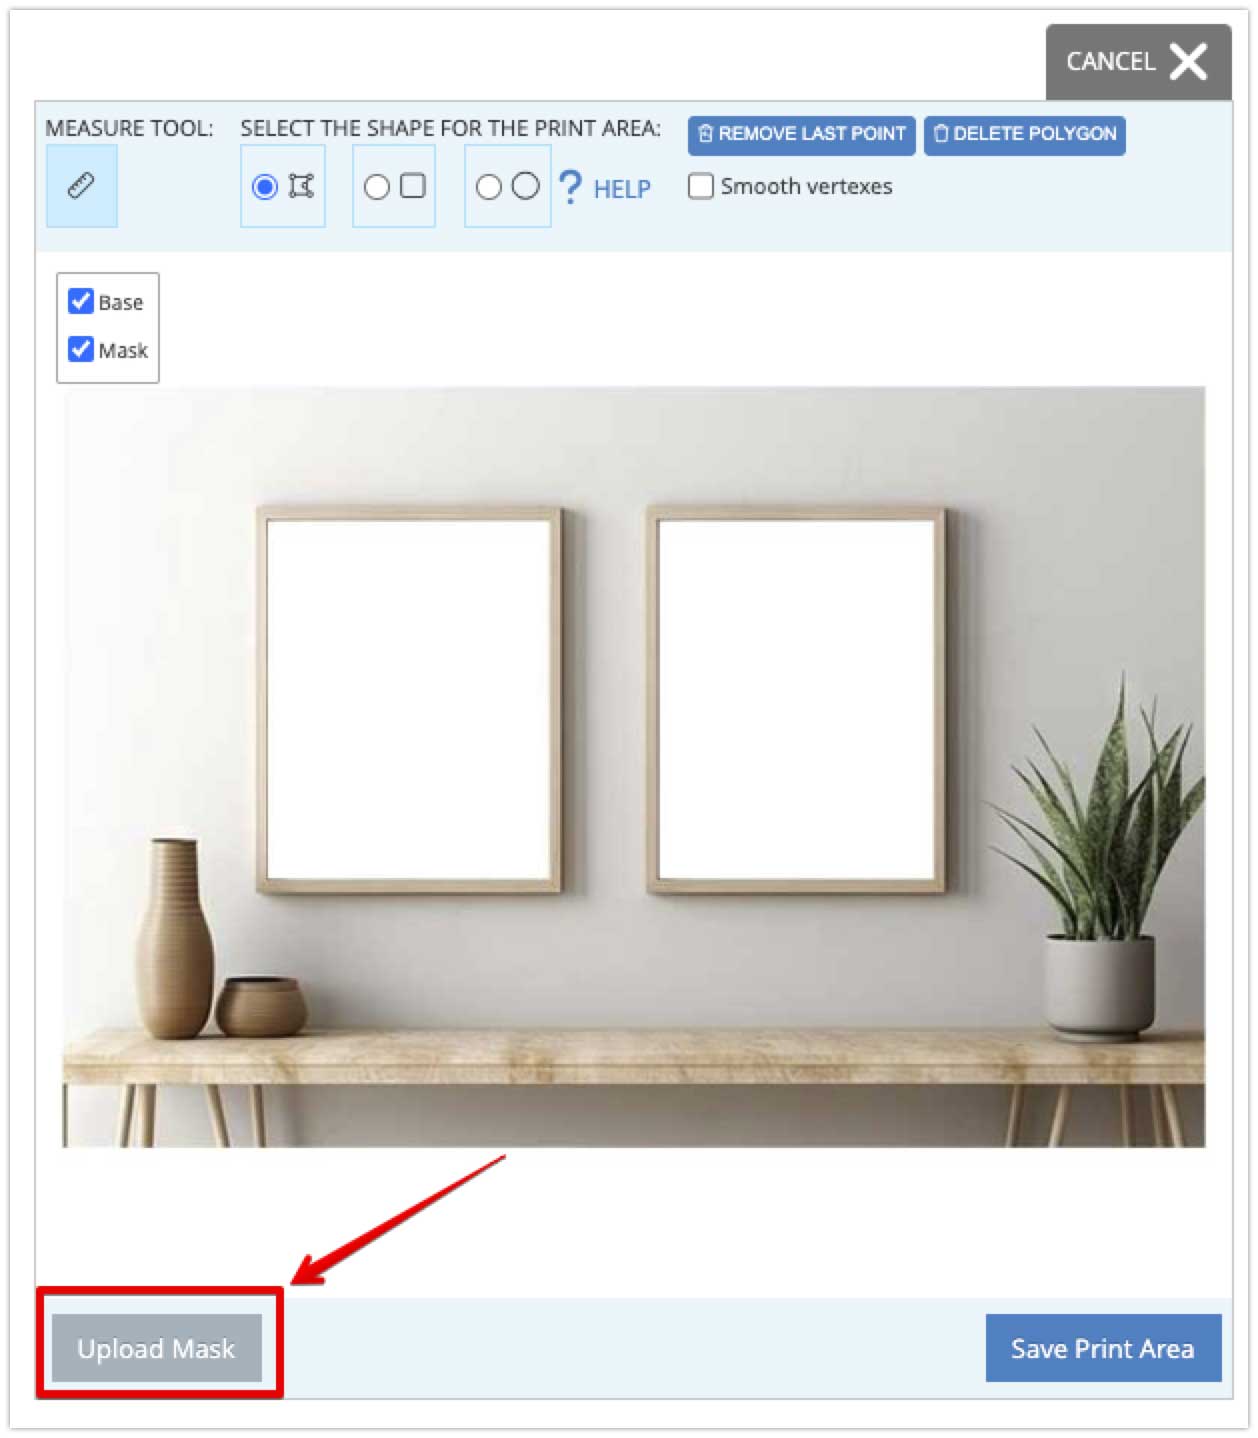
Now, click on the "edit Print Area" button and set the size of the template depending on the real size of the product.
Click on the mask button and select the mask image created in the previous steps (mask.png).
You can uncheck the "Base" checkbox to check that the mask has been properly loaded and the customizable areas (transparent areas) in the mask match with the base image.
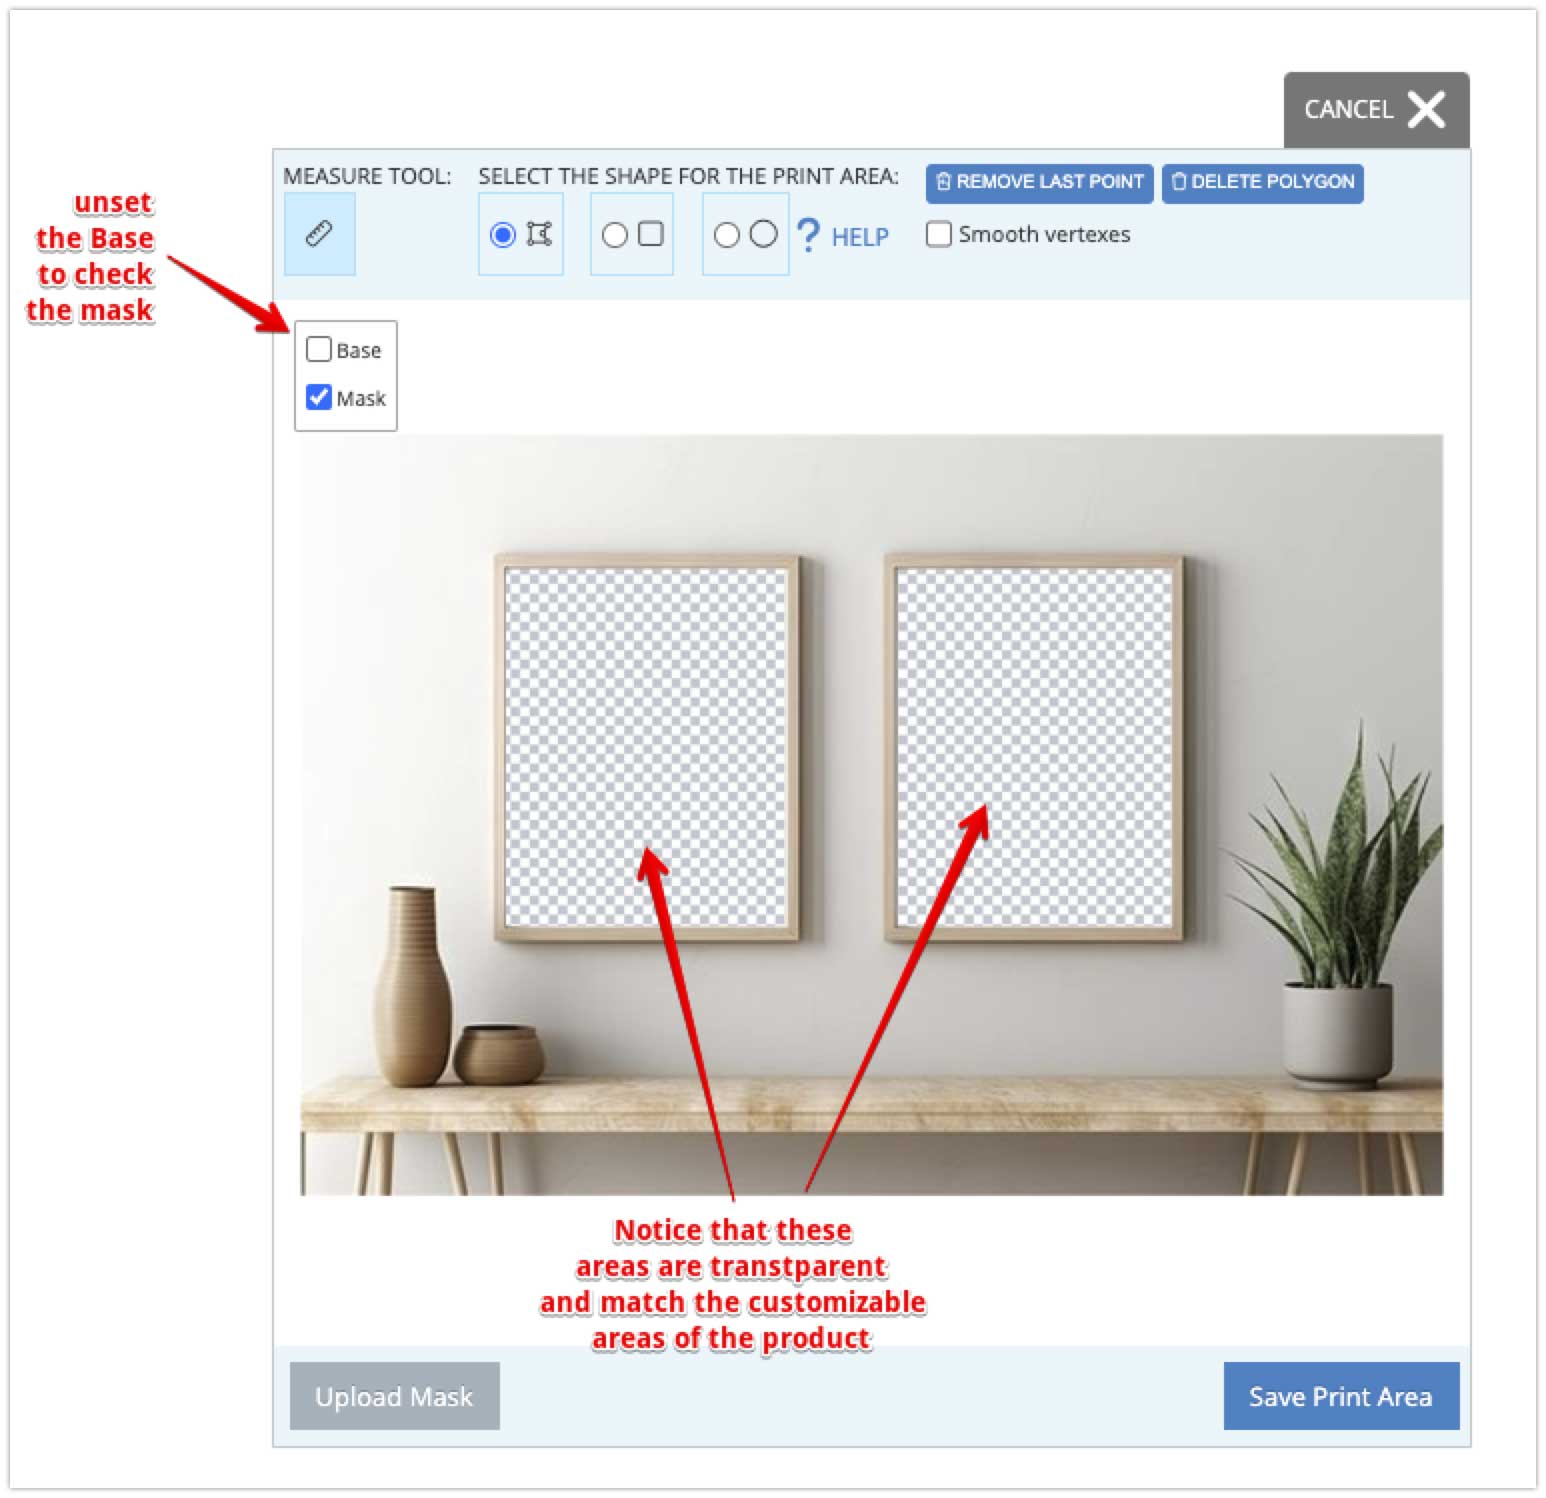
Now select the print area to cover the full customizable areas on both canvases.

Now save the template and finish the settings of the product as usual. You have now a product template with 2 separate customizable areas.
