How to create a semi-transparent mask file for a product in Photoshop (Template Based on Colors).
When you create a product template in Qstomizer based on colors, you will need to create a mask for the product that allows multiple background color using the same template.
To do so, it is necessary to create a semi-transparenk mask image for the product that allows watch the product in several colors and can contains some details of the product like the wrinkles on a cloth.
To create the base image of the product, we will use a complete whitye image and to create the mask, we are going to use Photoshop.
We will use Photoshop because it is the most common image editing software but, you can use any other software like GIMP.
To create a product template based on colors with a semi-transparent mask, we will need 2 images of the product as usual:
- A JPG or PNG file for the base image.
- A PNG file for the mask.
As an example, we are going to create the base and a mask image for t-shirt.For the base image, we will use a completely white image:
1. The Base image (JPG or PNG).
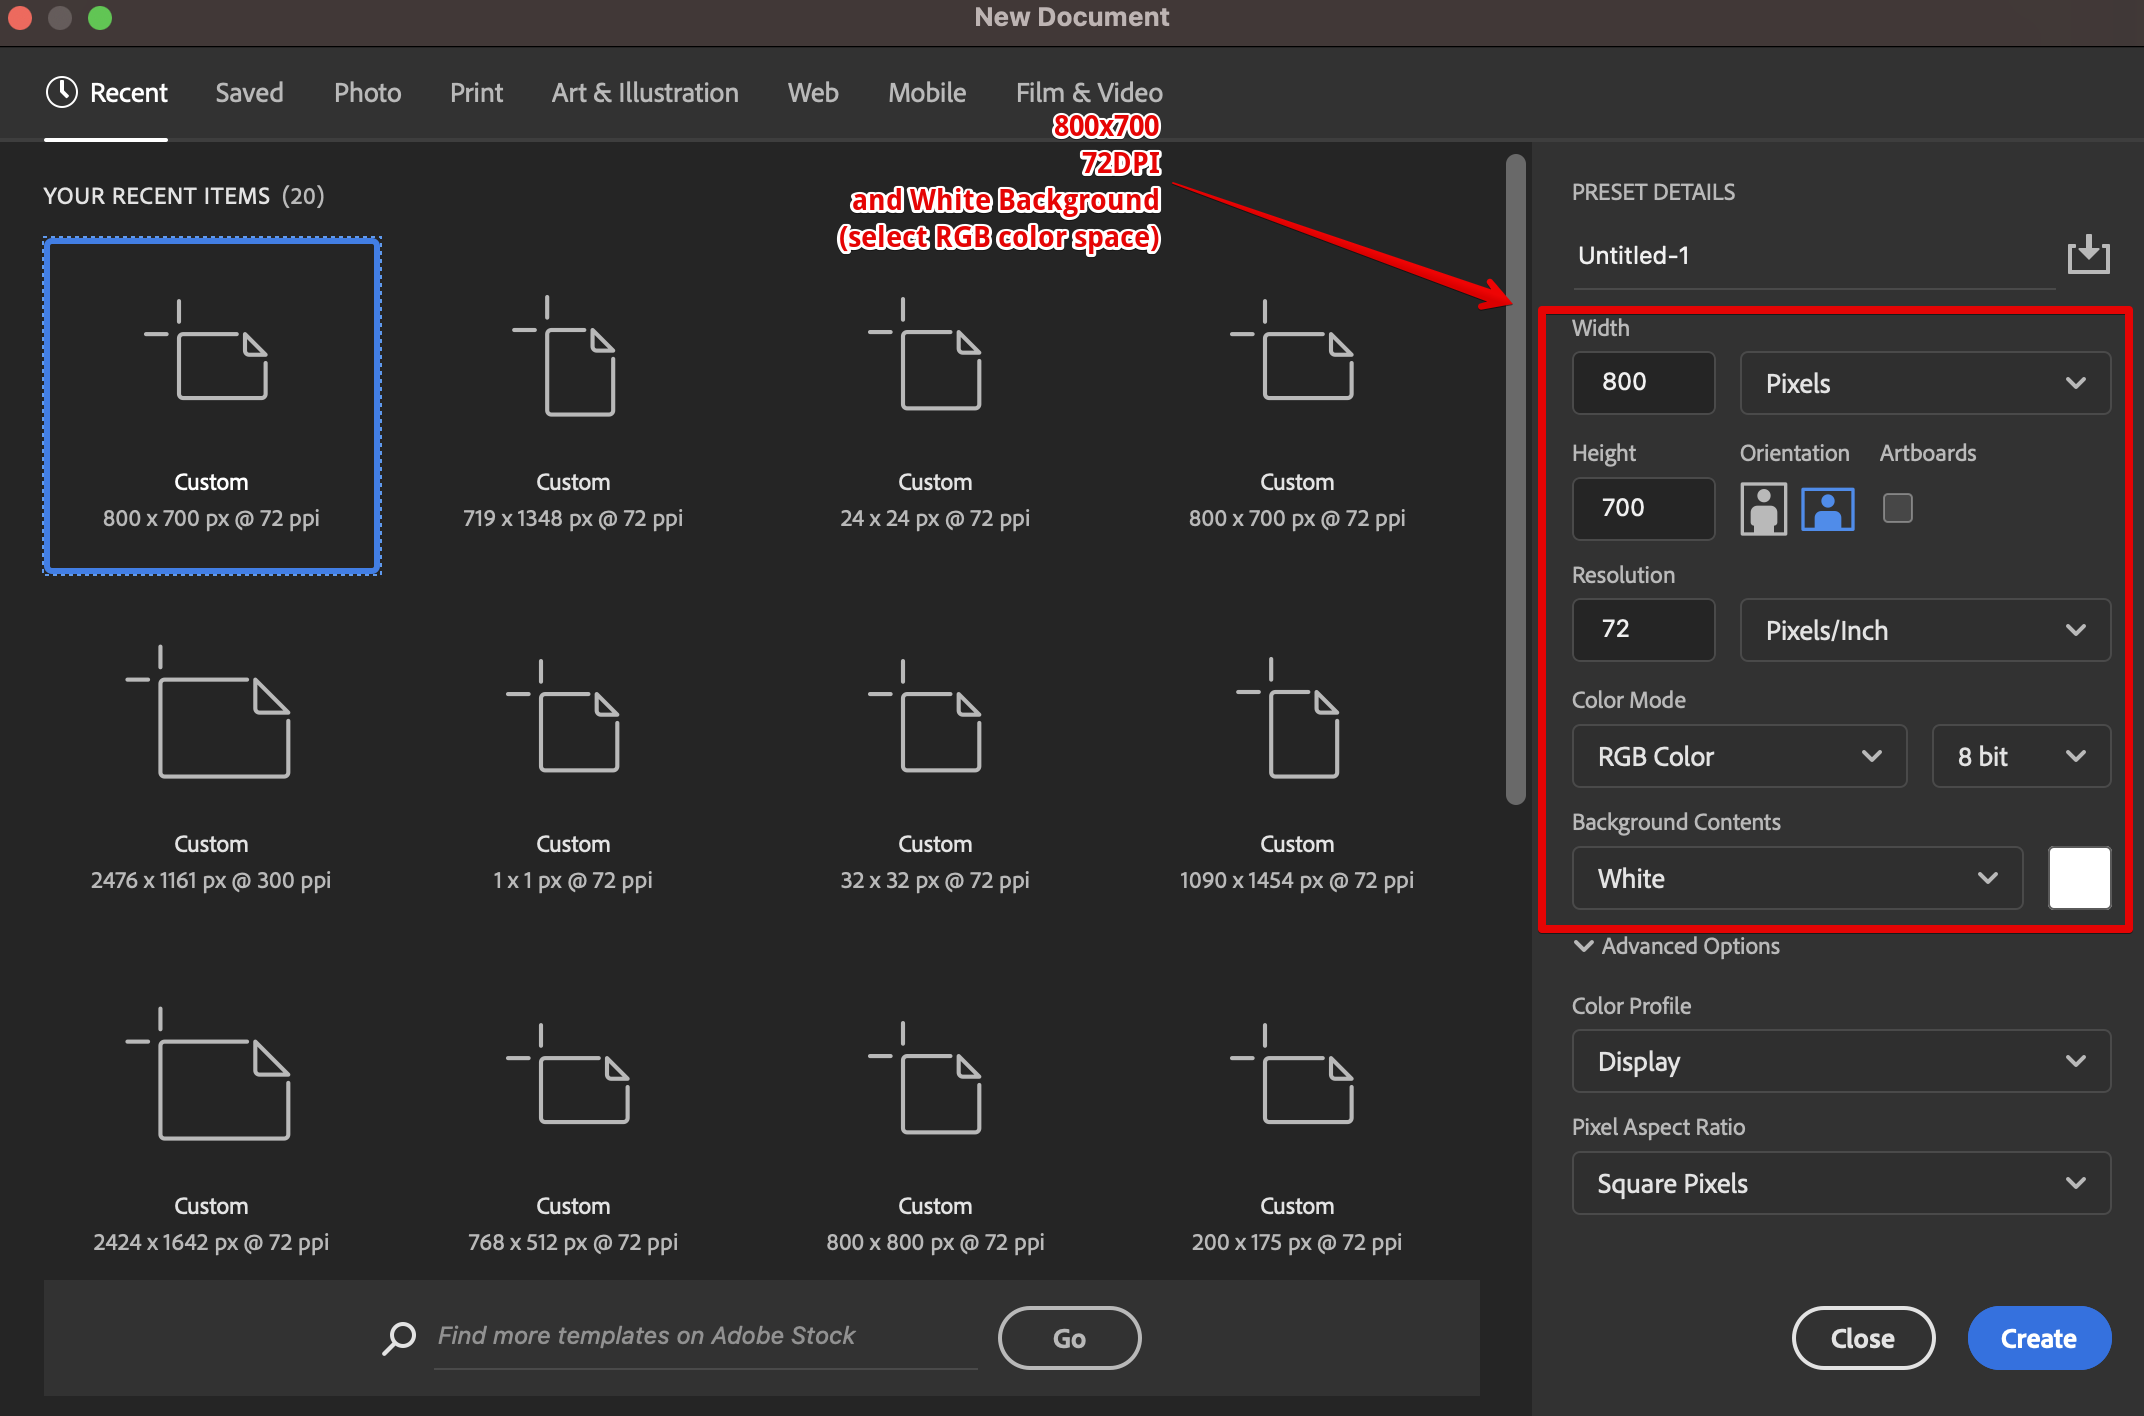
We can create an image with any size but as the canvas of the tool has a size of 800x700px, we are going to create an image with that size to cover the full canvas.
We open Photoshop and create a new document. We select "Custom" and the size 800x700px, 72 dpi. In "Color Mode" select 8 bit "RGB Color". And in "Background Contents" select white.
Select the option File->Export->Save for web(Legacy) and save the file in PNG or JPG.

Now, you have the base file for your product.
2. The Mask image (PNG).
Open a New Document in Photoshop with the same size as the base image. In our case, select "Custom" and the size 800x700px, 72 dpi. In "Color Mode" select 8 bit "RGB Color". And in "Background Contents" select white.
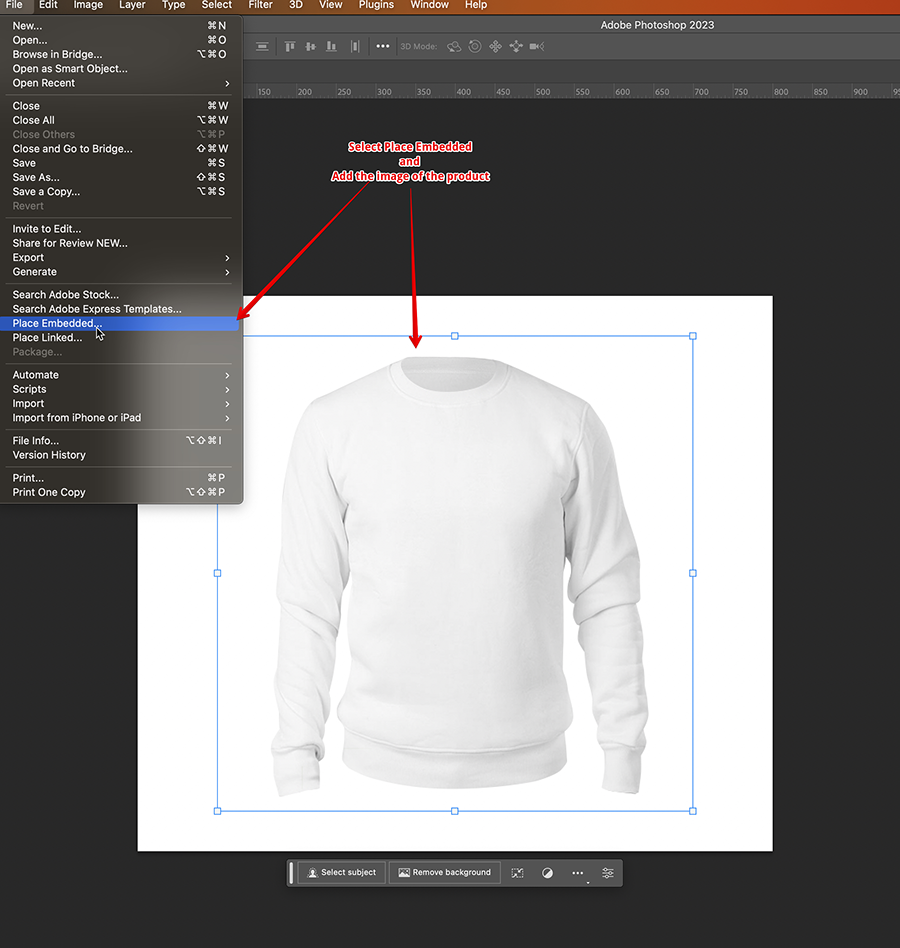
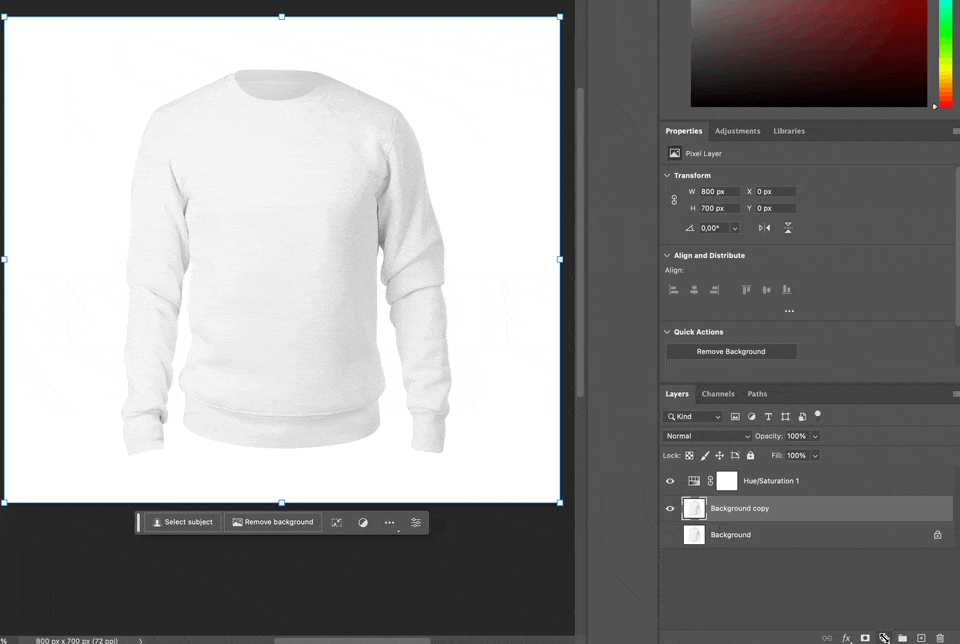
Go to "File->Place Embedded" and add the image of the product (in our case a white long sleeve tshirt). Place the image in the center of the canvas and resize it if it is necessary.
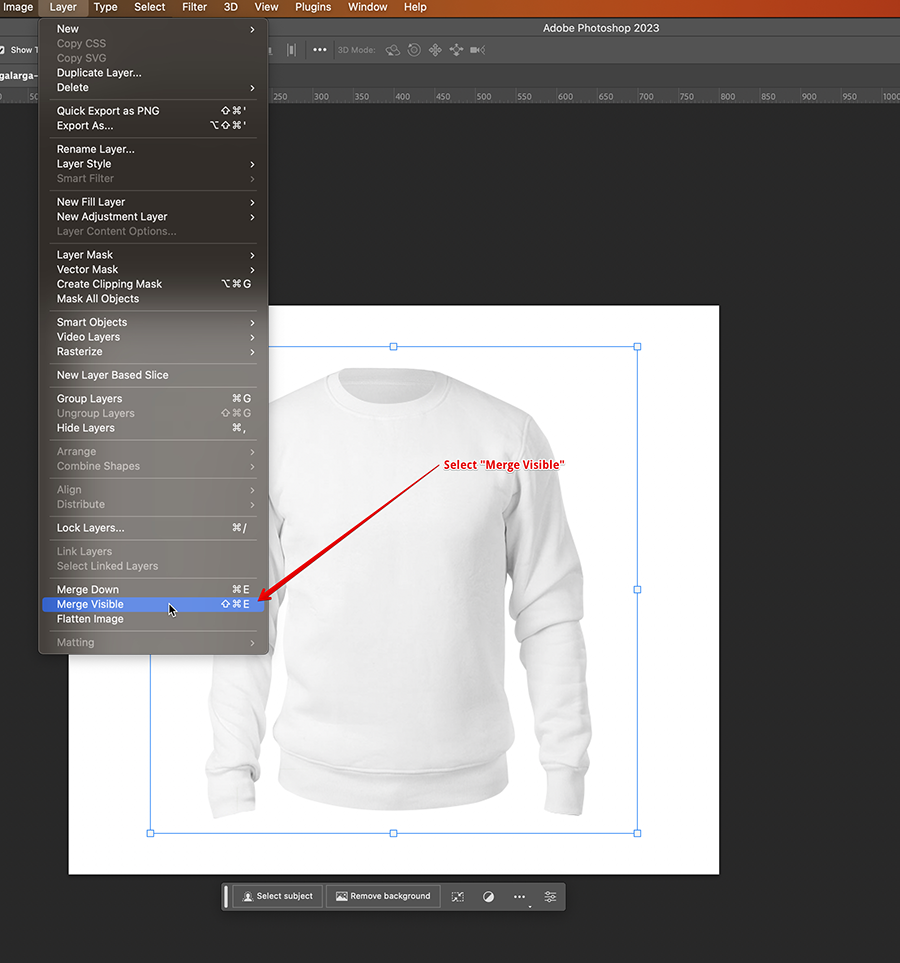
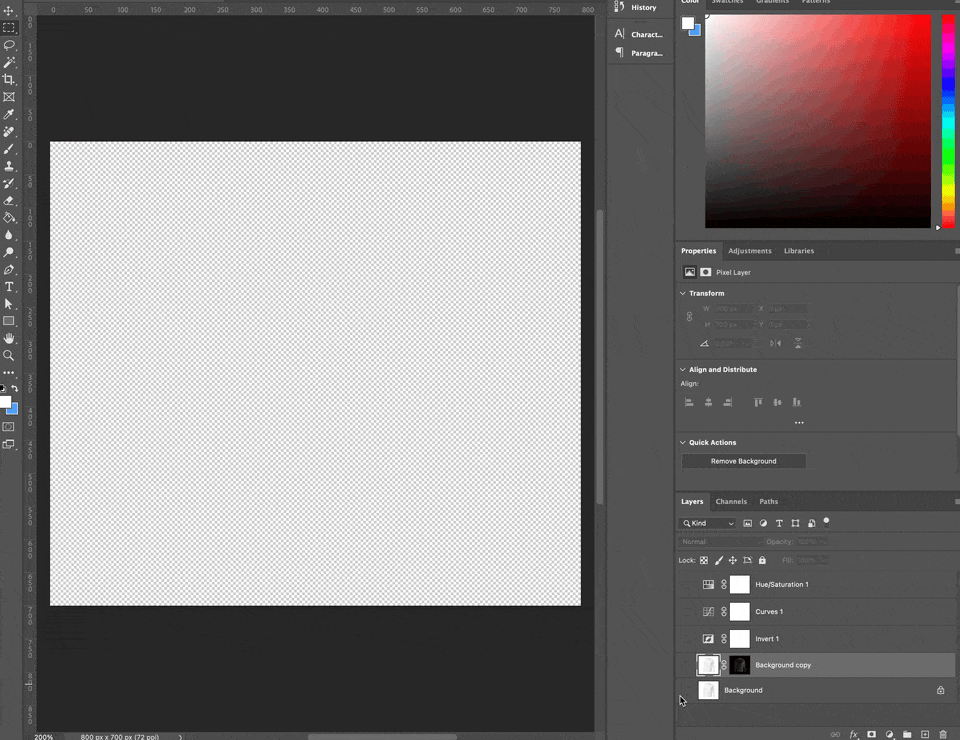
Go to "Layers->Merge visible" to merge the image of the product with the background. In this way, we have the image and the background in a single layer with the right size.
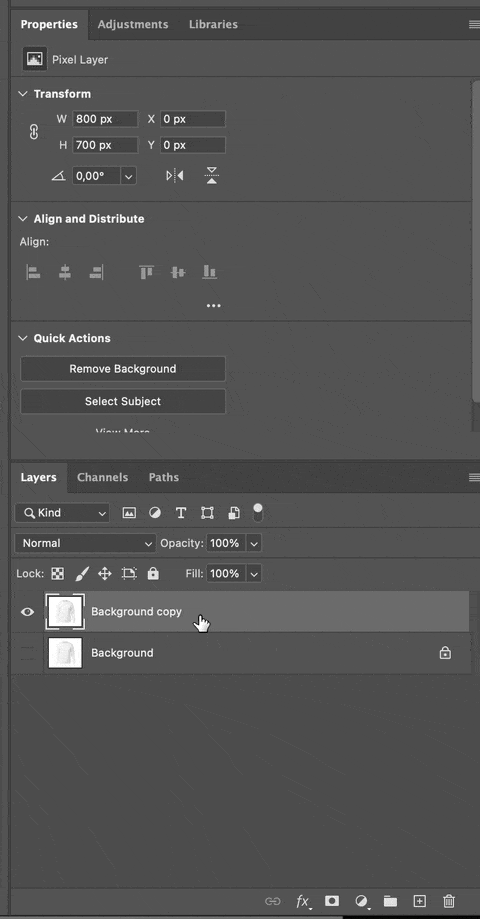
Duplicate the layer. We are going to apply the transformation with a duplication of the layer. To do so, right click on the layer and select "Duplicate layer" or drag and drop the layer on the "+" button at the bottom of the "Layers" tab.
Hide the background layer. We will need it layer. We will work with the copy of the layer that we have just created.
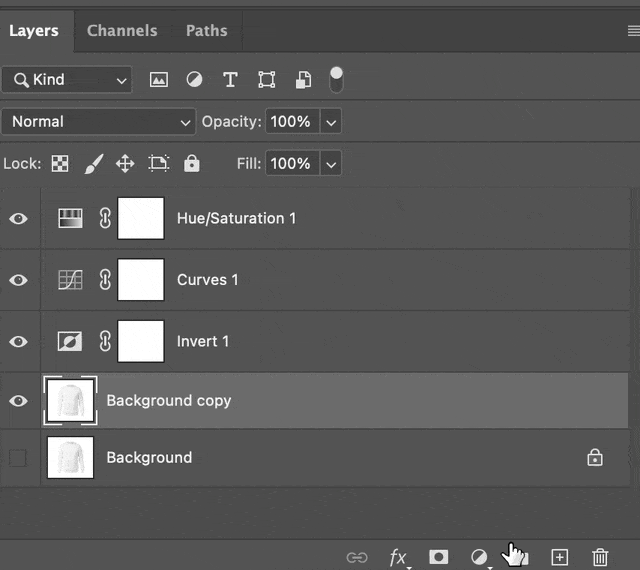
In the copy of the layer, Add a Saturation/Hue adjustment layer and turn down the Saturation until the image has no color. If you don't have any gradient in your original image, you can just use a Threshold adjustment layer instead, which will result in 100% black or 100% white results.
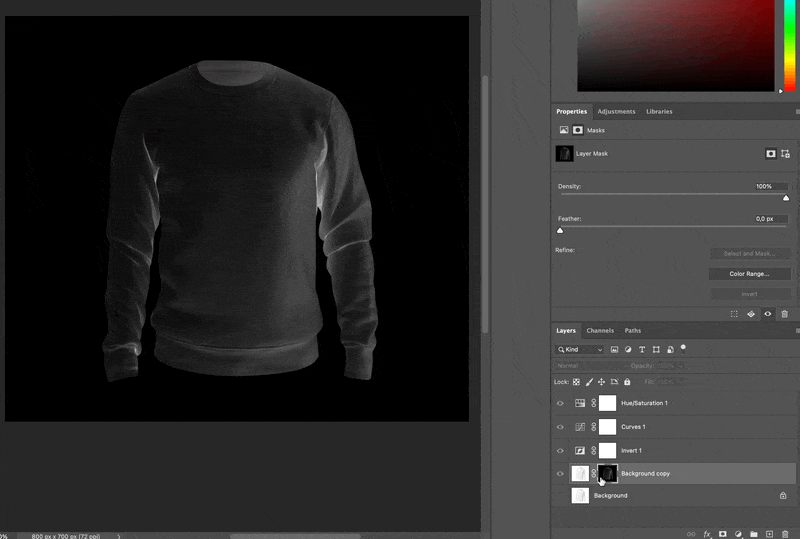
Add an Invert adjustment layer, then a Curves adjustment layer. Tweak the Curves until everything you'd like to be solid/opaque is white, and everything you want fully transparent is black. You may have to tweak this a few times to get the amounts right.
Now CTRL + A to select the entire image and CTRL + SHIFT + C to copy the combined greyscale result. Create a layer mask on your original layer. Now ALT + click in the layer mask icon to enter direct edit mode. Now paste the black and white image you just copied into there.
Now click back on your original layer to exit the layer mask direct edit and hide all your adjustment layers.
There you have it! If you find your finished result isn't fully opaque (solid) in the areas you like it, you can either tweak the curves and do it again (you'll need more white in those areas), or just duplicate the result/layer a few times until it becomes less transparent.
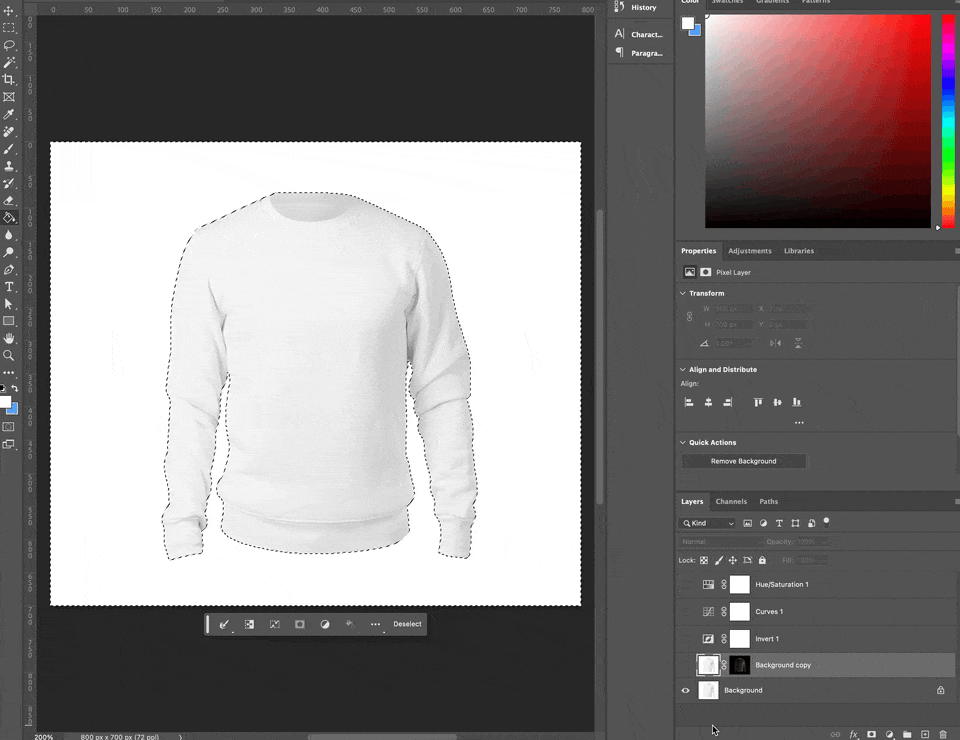
Finally, you only need a white color surrounding the semi-transparent mask.
To achieve it, you have several methods: The easiest way is to make the background visible and use the "Magic Wand Tool" to select the space surrounding the product. (you can also use the "Pen Tool" to create a path for a more precise selection).
Then create a new layer over the top of all the other layers and fill the selection with white.
Select the option File->Export->Save for web(Legacy) and save the file in PNG-24 format with transparency.

